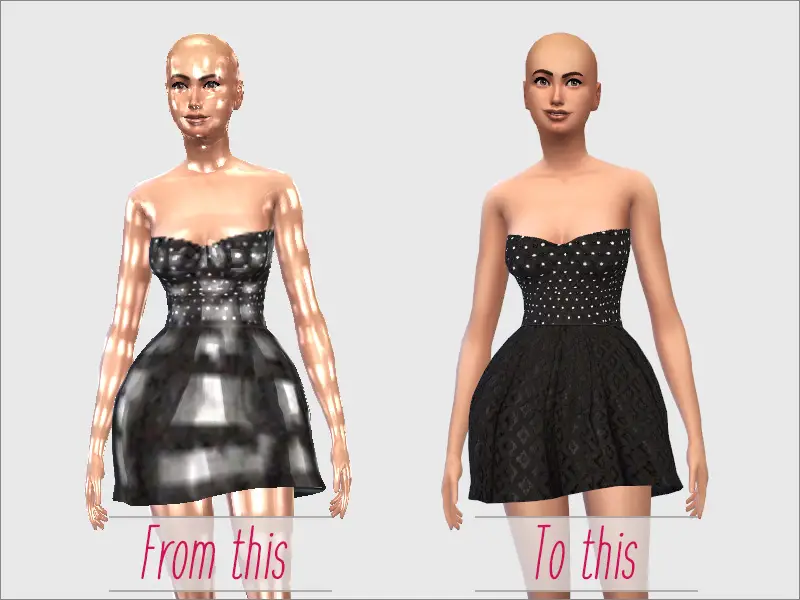
This issue has resurfaced with Island Living patch, when sim that wears particular custom item becomes covered in shiny squares. This happens on lower graphic settings. Particularly on my PC I was able to catch this glitch when I started the game on Ultra settings and then switched to lower (anything lower Ultra) graphic settings. Whenever I started the game on Low settings I could not see this glitch. Also, it is difficult to find glitchy content when you have to go in the game each time, when in CAS it looks absolutely fine because CC in CAS is rendered with 2048 px resolution, and CC gets shiny only when rendered in resolution 1024 px and less (all graphic settings except Ultra).
I came up with solution how to fix these kind of files, and how to find them in CAS without going each time in the game.
You will need the following programs:
Sims 4 Tray Importer (to find the file in your folder)
Sims 4 Studio (to fix the file)
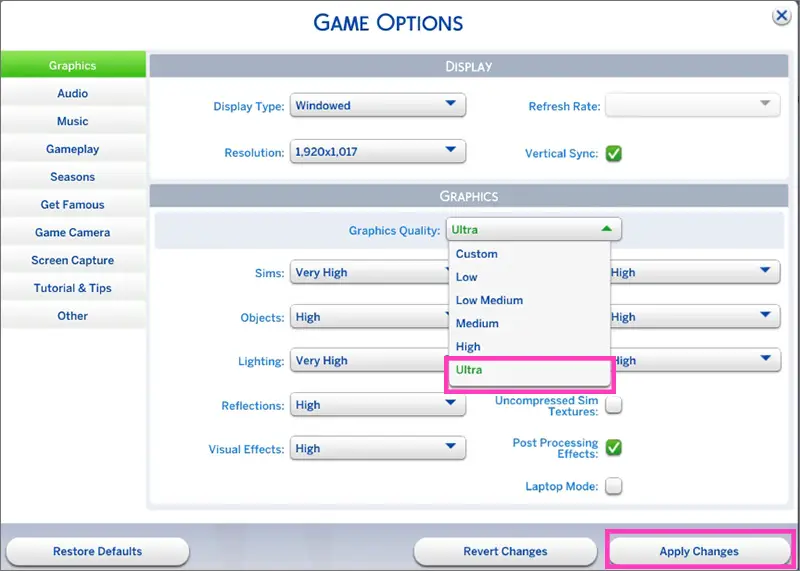
1. Start your game and check graphic settings. Set Ultra (the highest) settings. Apply changes and restart the game. It is important to start the game with ultra settings, not high, but the highest.
2. Run your game and load CAS. Now go in Settings -> Graphics -> Low. Choose the lowest graphic settings and apply them.
3. Check your custom content. Remove every single piece of clothing, even Maxis one and check custom clothing, make up, hairs one by one. Save them on your sim and use Sims 4 Tray Importer to find this content in Mods folder. Use Aveline’s video tutorial as a guide if you are not familiar with this program. Of course if you have thousands of CC pieces it will be a time consuming process.
4. Now it is time to fix this content. I noticed that all glitchy content had 2 things in common: it was made between 2015 and beginning of 2018 (2019 content is fine) and had blank specular on Studio tab. For this you will need to have the latest version of Studio.
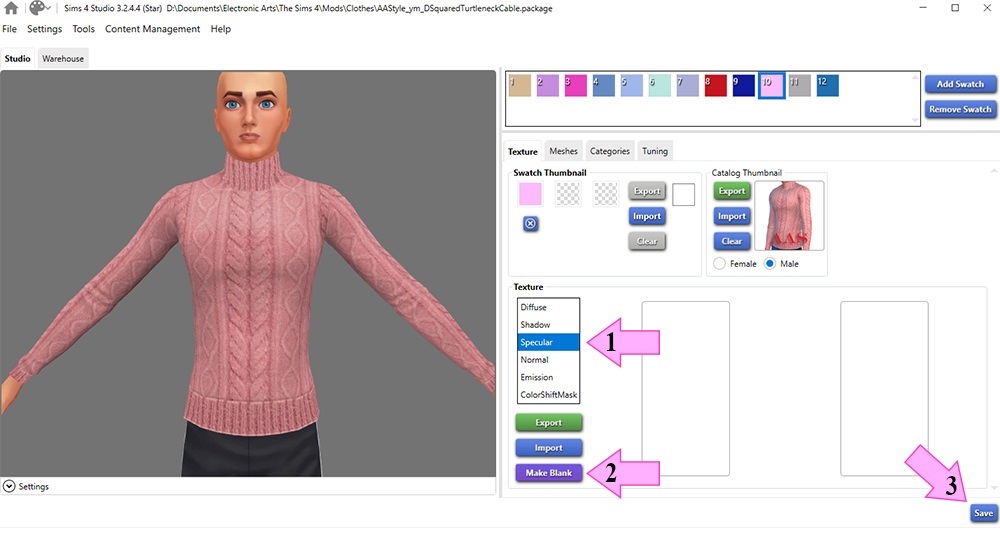 In order to fix these files, you need to click on “specular” button -> make blank and save. That’s it. Do with every The newest Studio creates a proper blank specular map that uses the shape of diffuse picture (main texture) as a mask. Blank specular textures created this way will not cancel the shine of other items.
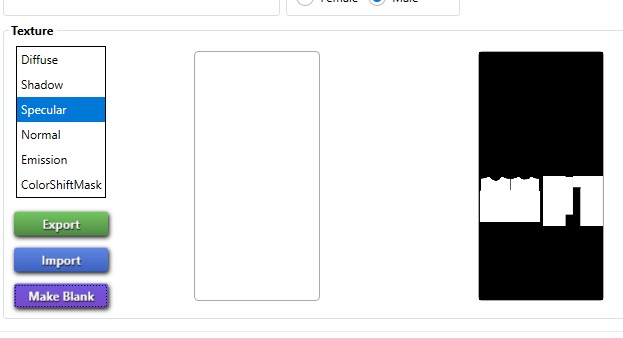
Your specular texture should look something like this after fixing it.
 Toddler Frilly Socks 2.0
 Frilly Socks For Infants
 Designer Earrings № 4 For Kids
 Detecting and fixing shiny post patch custom content
 Hello Kitty Stud Earrings For Toddlers
 Little Diamond Pave Hoop Earrings For Infants
 Frilly Socks For Kids
 Bellatrix Hoop Earrings
 Frilly Socks For Toddlers
 Star Nose Piercing Set
